Bunny Cinnamon Rolls are the perfect Easter morning breakfast. Classic cinnamon rolls are shaped into bunny ears, without much extra time or effort!
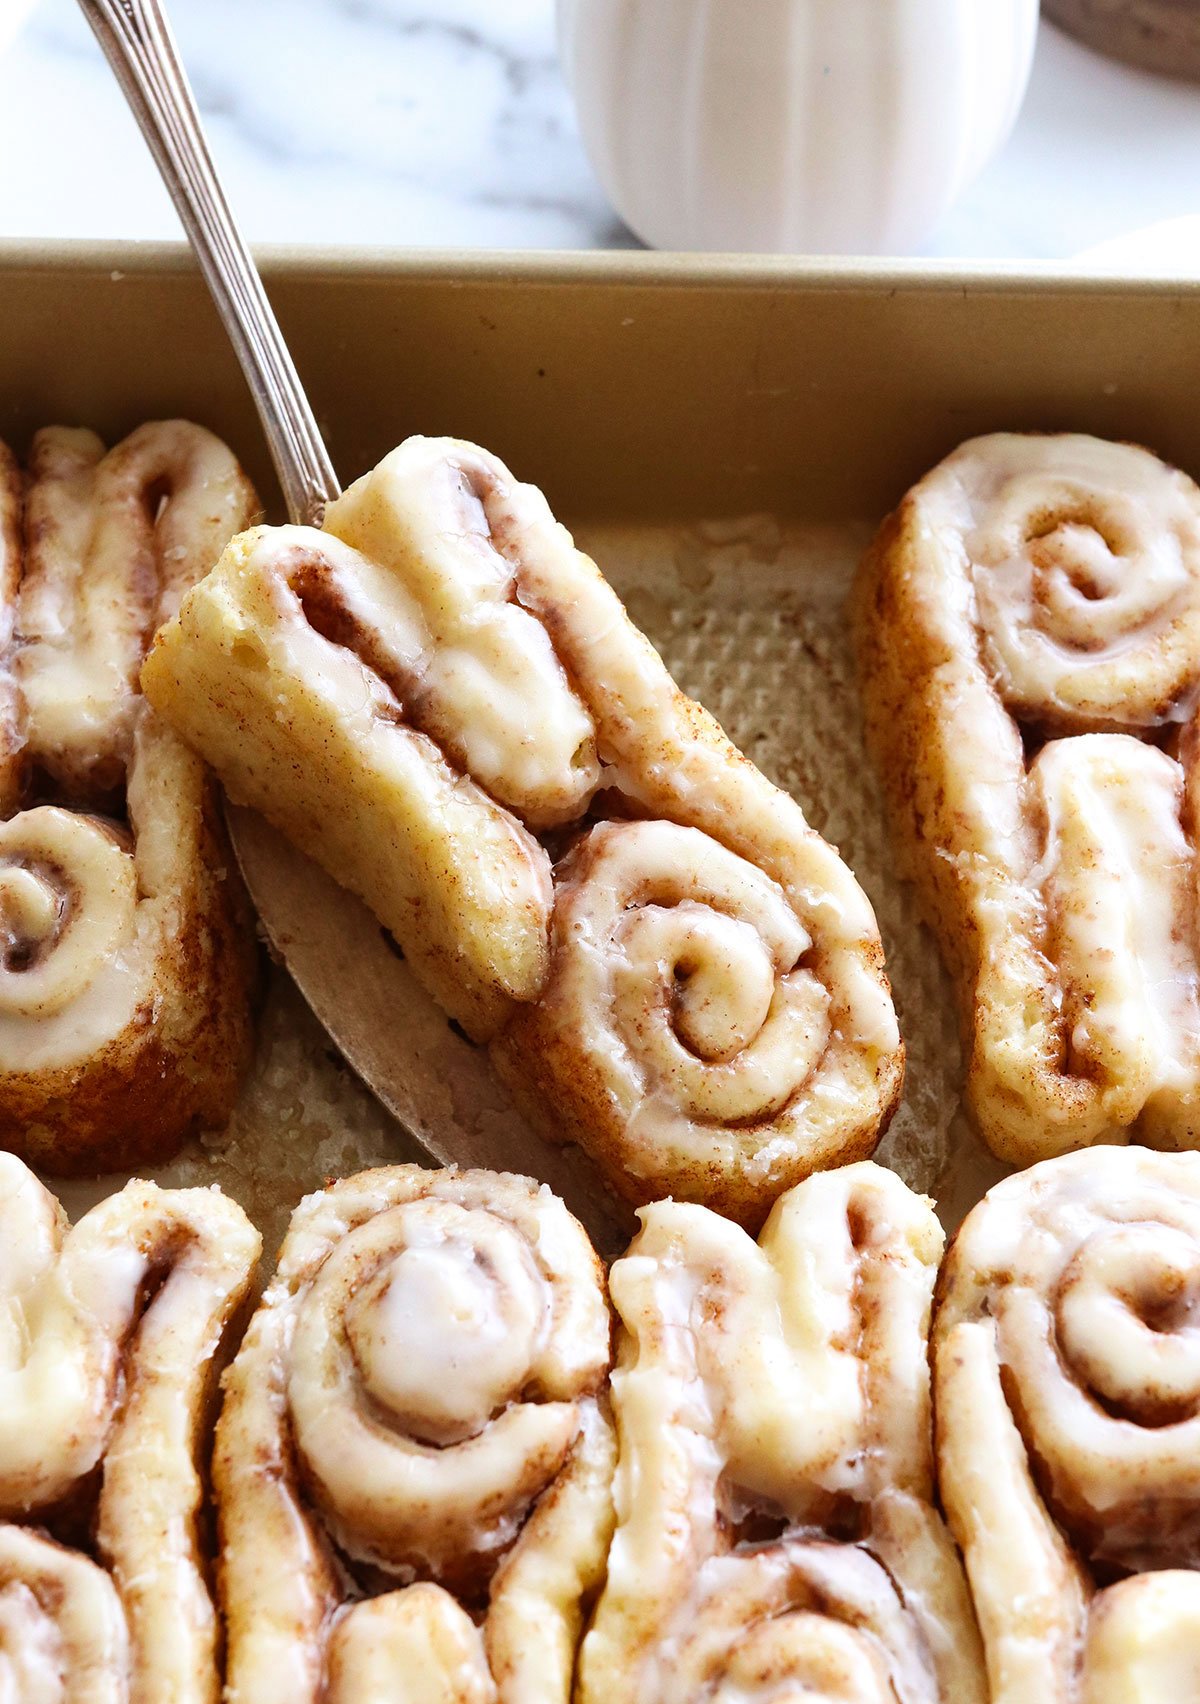
Cinnamon rolls are an extra special Easter breakfast treat and this shaping method makes them even more fun. You can use any recipe you love or even store-bought cinnamon roll dough to make the process easier. They can bake as you hunt for Easter eggs!
I tested this idea using a few different methods, so I’ll share the results below. Decorate them with festive sprinkles or any toppings you love for a cute Easter breakfast.
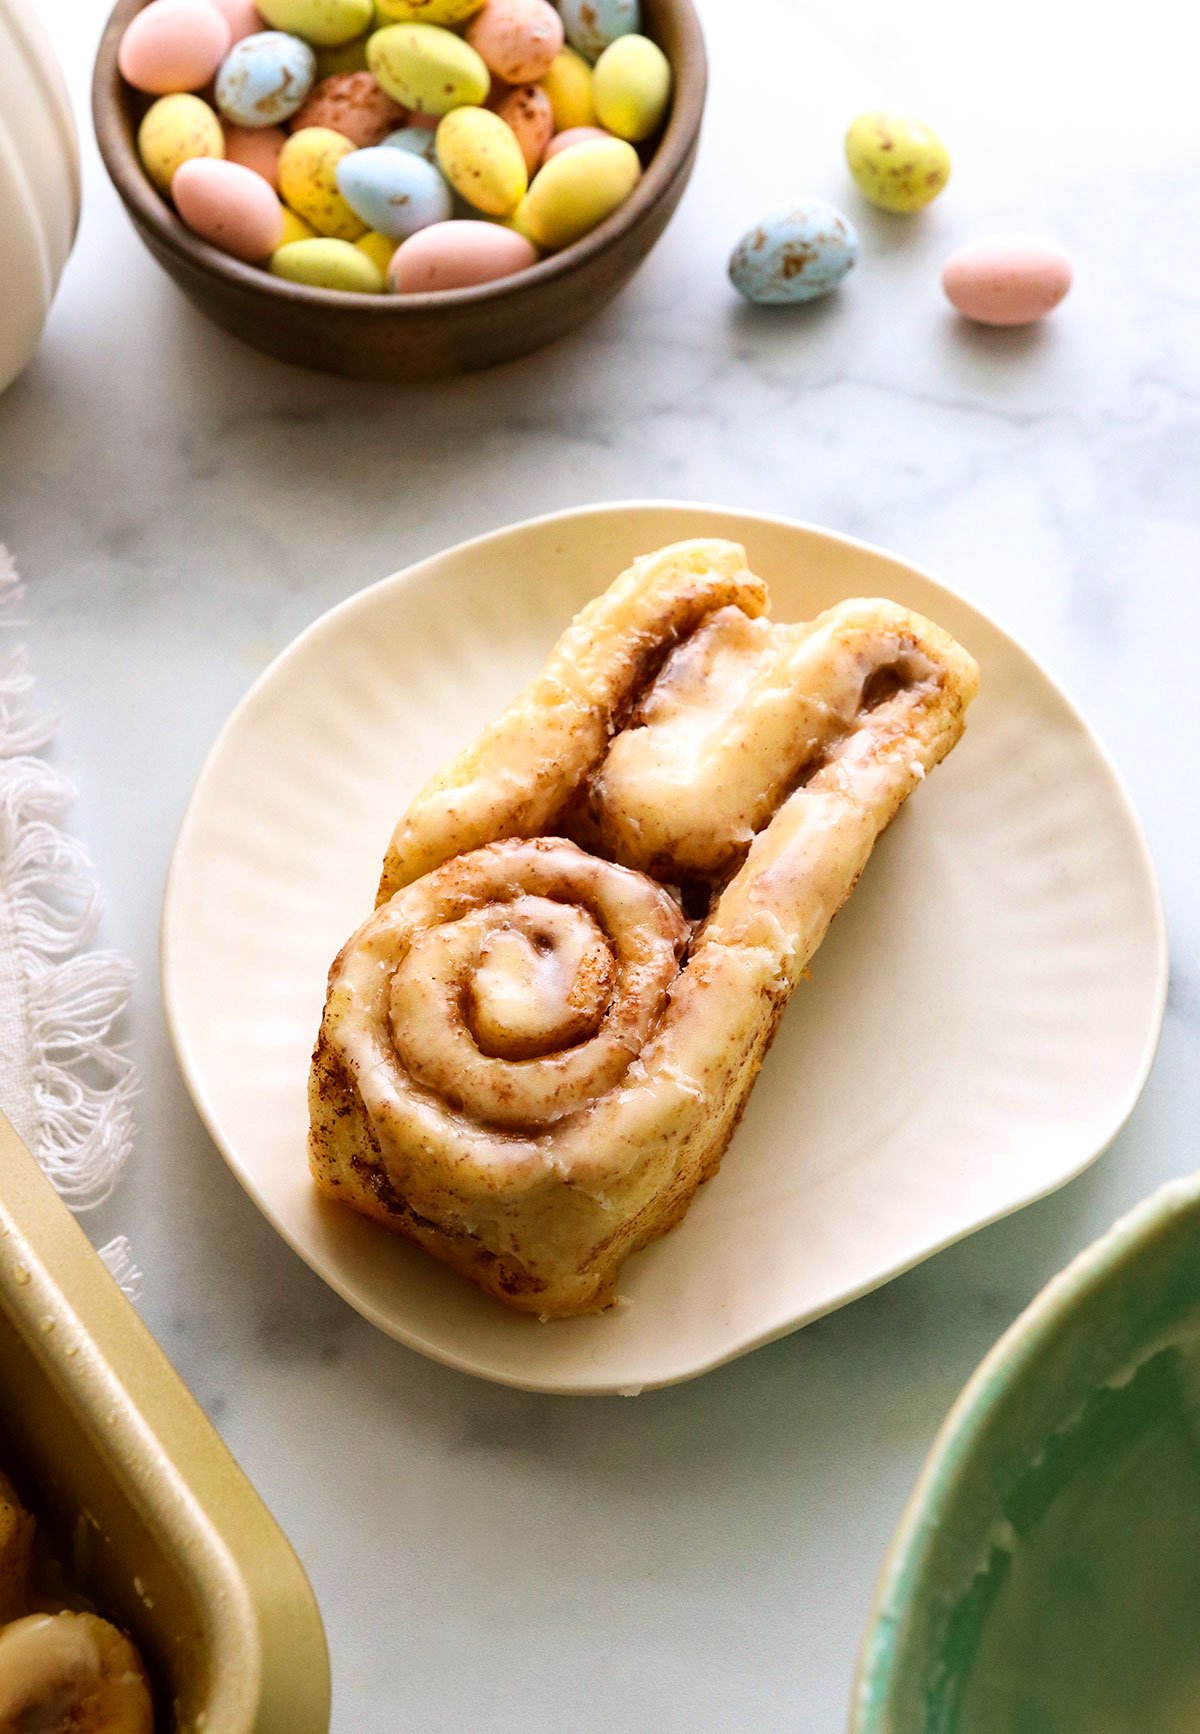
How to Make Bunny Cinnamon Rolls
To make cinnamon rolls from scratch, prepare your favorite cinnamon roll dough as directed and let the dough rise in a bowl for about 1 hour.
For these photos, I used my famous gluten-free cinnamon roll recipe. But, you can use another easy cinnamon roll recipe, or a package of cinnamon roll dough to make these adorable bunny cinnamon rolls even easier.
Once the dough has risen, use a rolling pin to roll it into a large rectangle, just as if you were making regular cinnamon rolls. Top with the cinnamon sugar mixture, then use a pizza cutter to slice the rolls into roughly 14 thin strips.
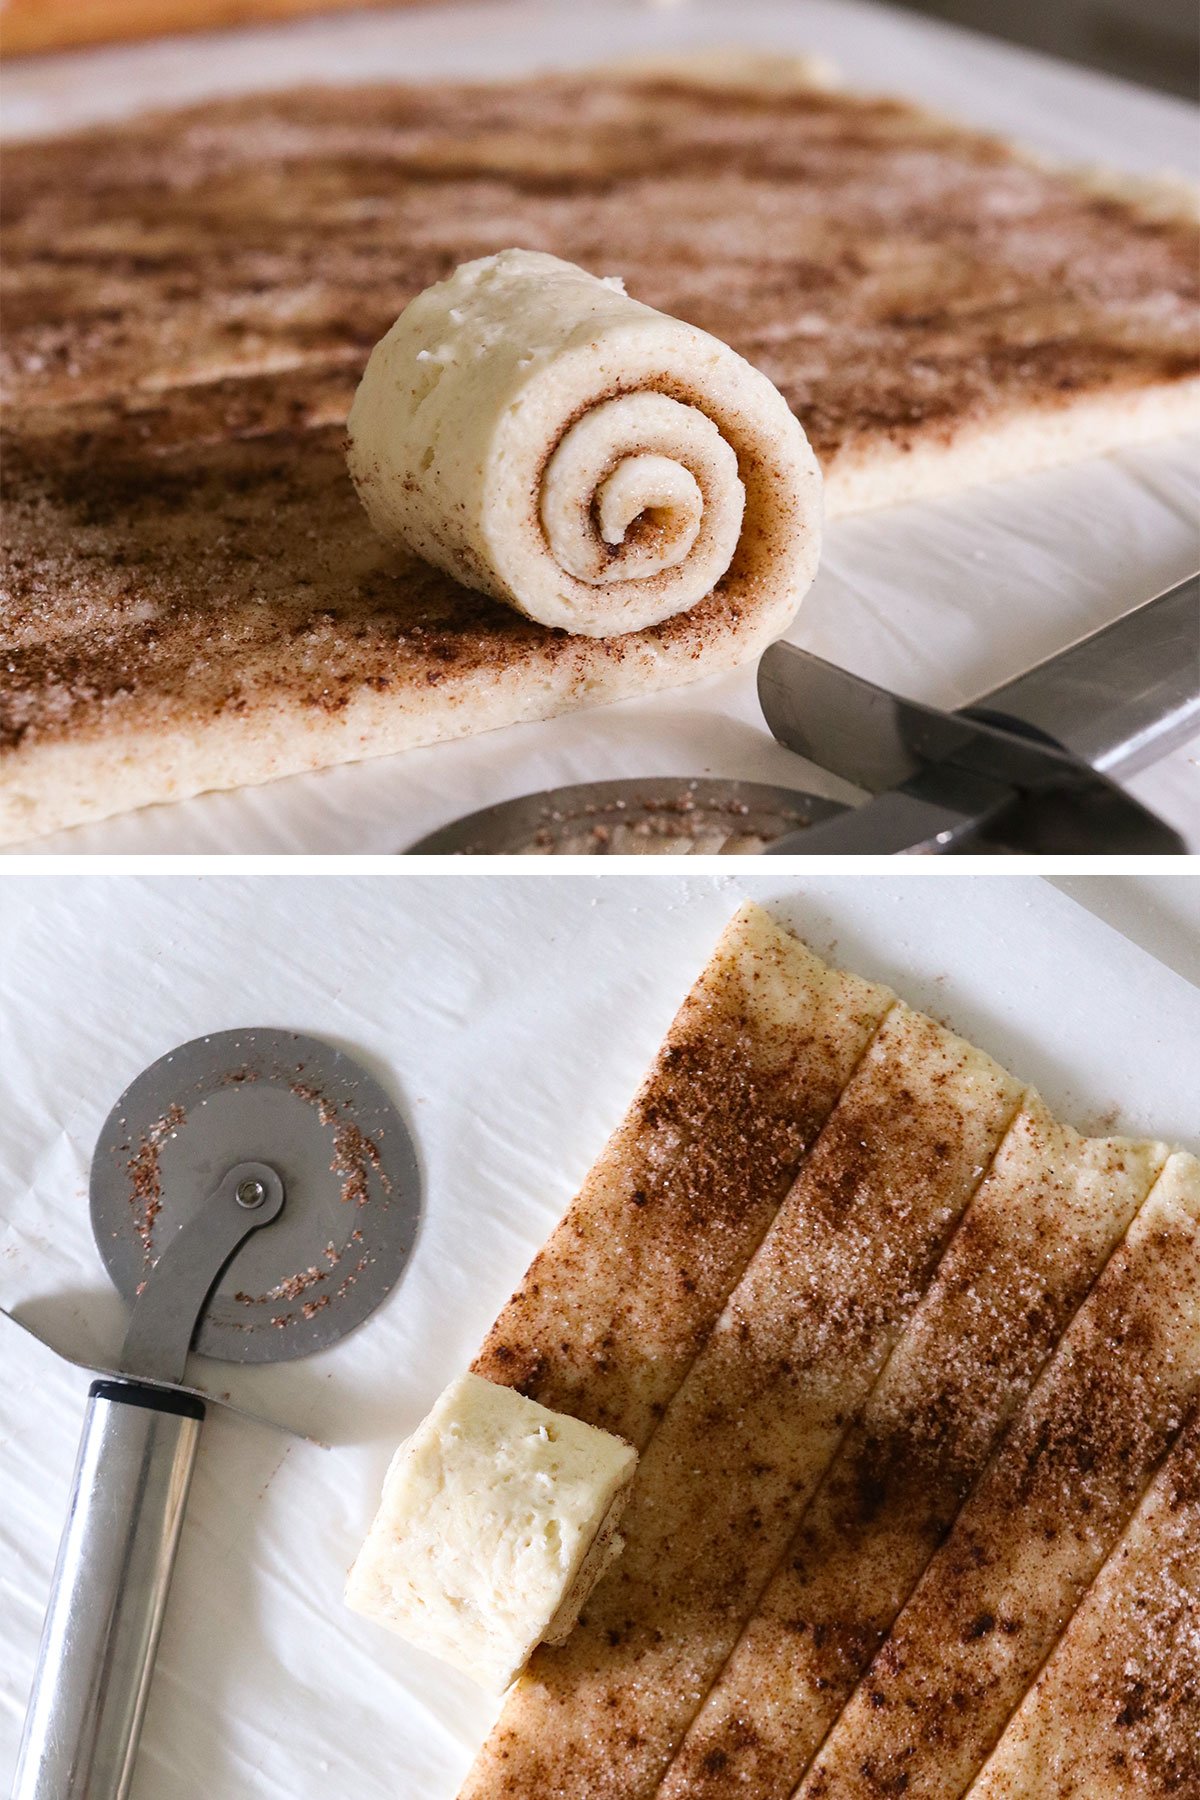
Roll each strip, starting at the bottom and working towards the top, until it creates a cinnamon roll shape. Repeat with the remaining dough.
Prepare a 9×13-inch pan by greasing it with cooking spray and cut several strips of parchment paper, about 1 inch thick and 6 inches long, to have nearby. Place one of the cinnamon rolls in the pan and start unrolling it to the halfway point of the roll.
Use the strip you just unrolled to form two bunny ears and secure the outer end of the roll near the center of the cinnamon roll. It should look like a bunny head!
Repeat this process, unrolling each cinnamon roll about halfway and forming bunny ears on top.
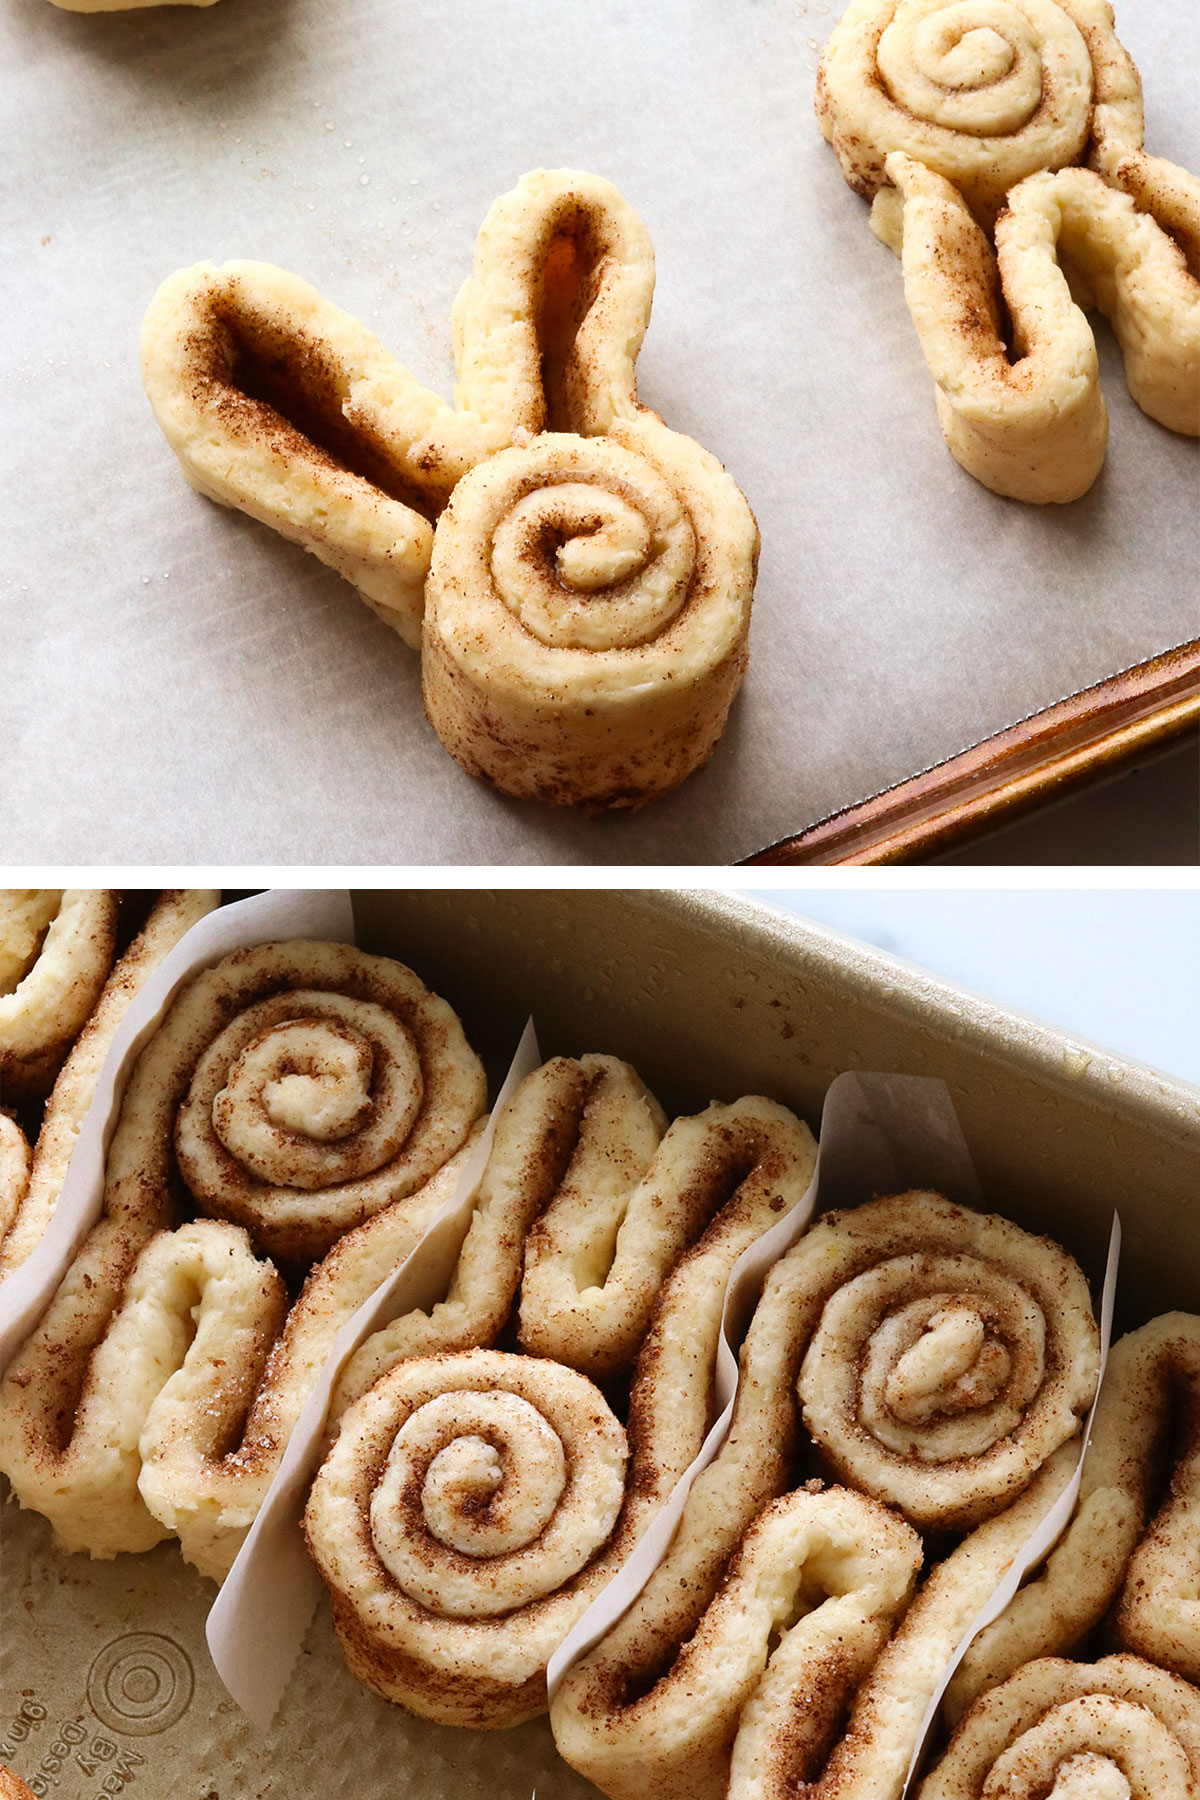
For the best results, arrange the Easter bunny cinnamon rolls next to each other, with a strip of parchment paper between each roll. Be sure to alternate when the ears or bunny face are touching the edge of the pan, as shown in the photos.
This arrangement will prevent the bunny ears from spreading too much as they bake in the oven. If you attempt to place these bunny-shaped cinnamon rolls on a baking sheet without them touching, the ears will distort as they bake.
The only way around this (if you prefer to use a baking sheet) is to use a toothpick to hold them together, but then you’ll need to remove each toothpick after baking. Plus, cinnamon rolls dry out when baked on a sheet like this. If you prefer a crunchy cinnamon roll, rather than a gooey one, this is another option.
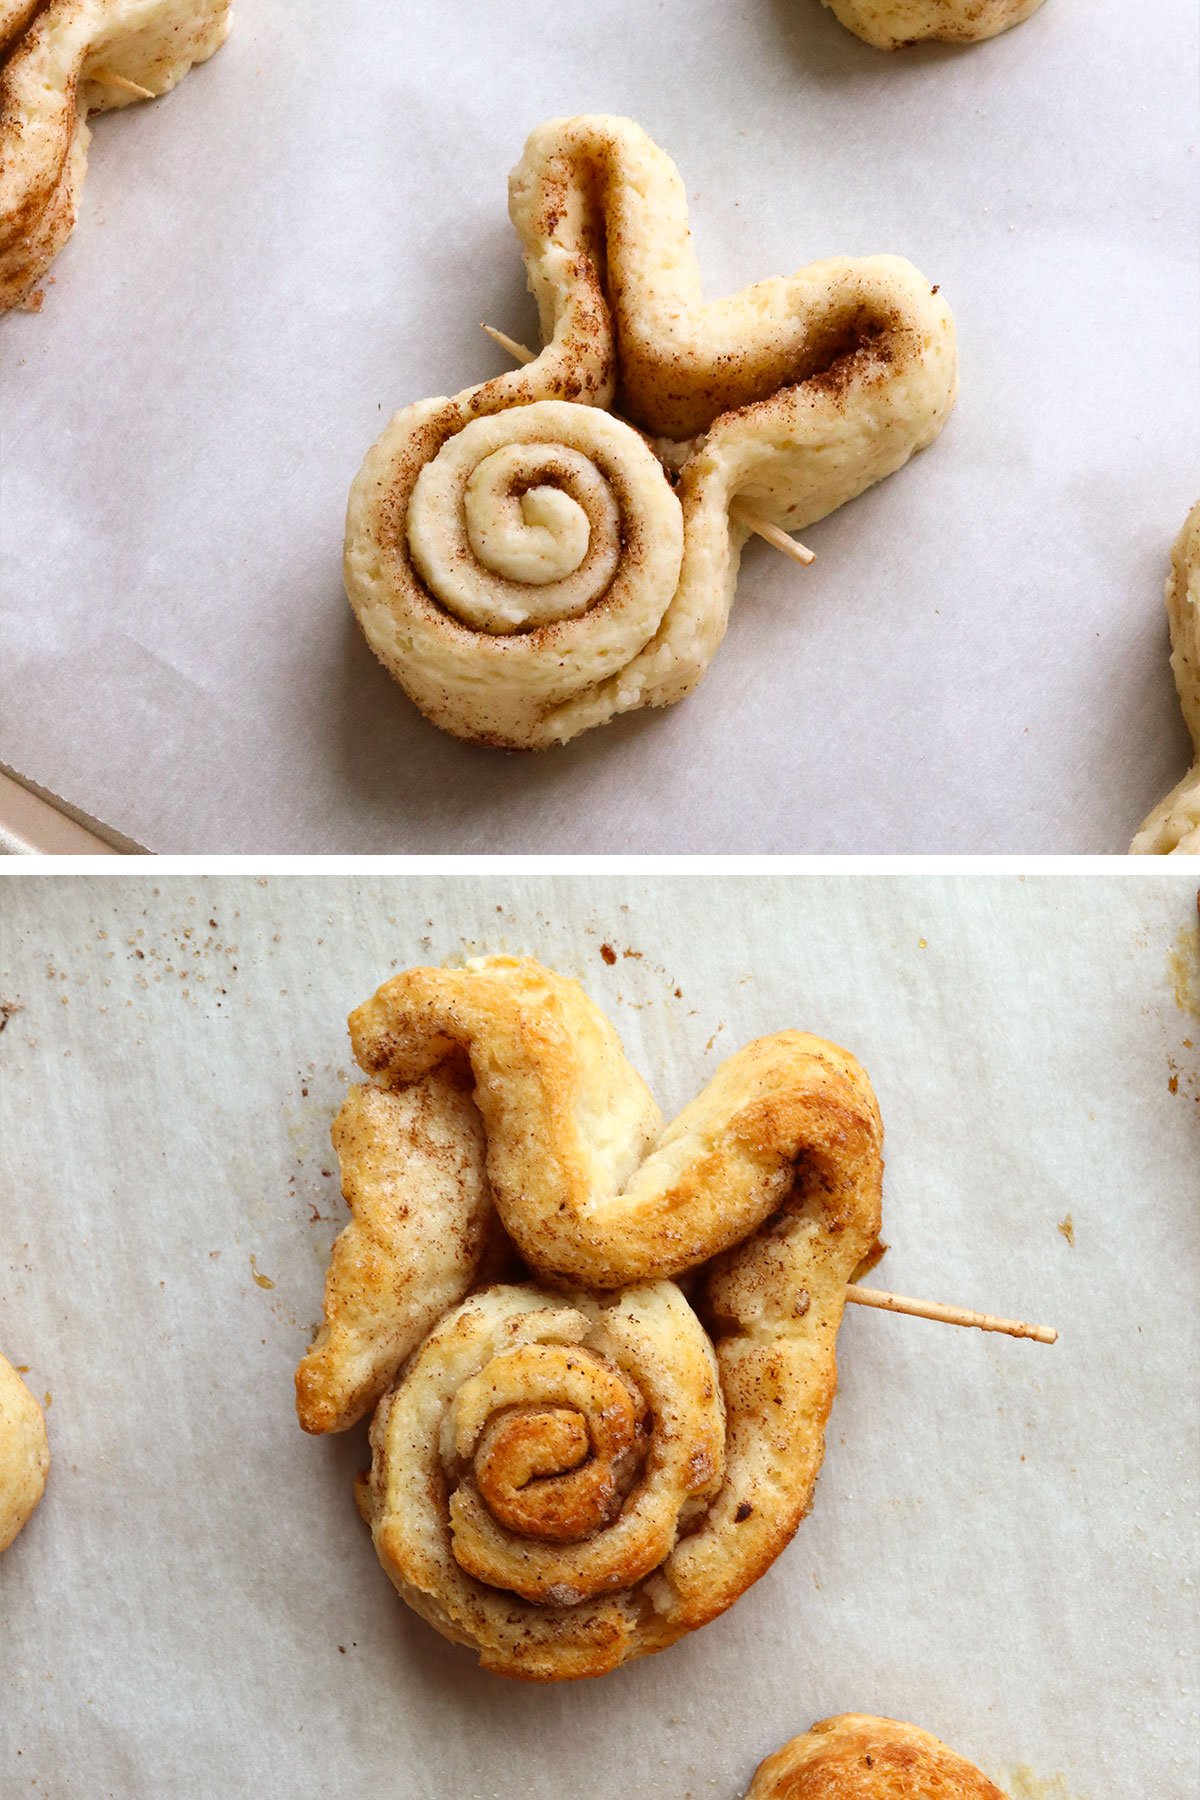
For more tender results, bake them close together in the 9×13-inch pan as directed. It’s by far the easiest method!
Let the cinnamon rolls rise for a second time, about 45 minutes, then bake at 350ºF for 25 to 30 minutes. Gluten-free cinnamon rolls with not turn as golden brown as traditional ones, but they are still just as delicious.
Immediately spread your favorite frosting or glaze over the cinnamon rolls with a spatula while they are still warm. It should melt into the cinnamon roll, so you still see the cute bunny shape.
Top with sprinkles or any other toppings you like for a fun holiday treat.
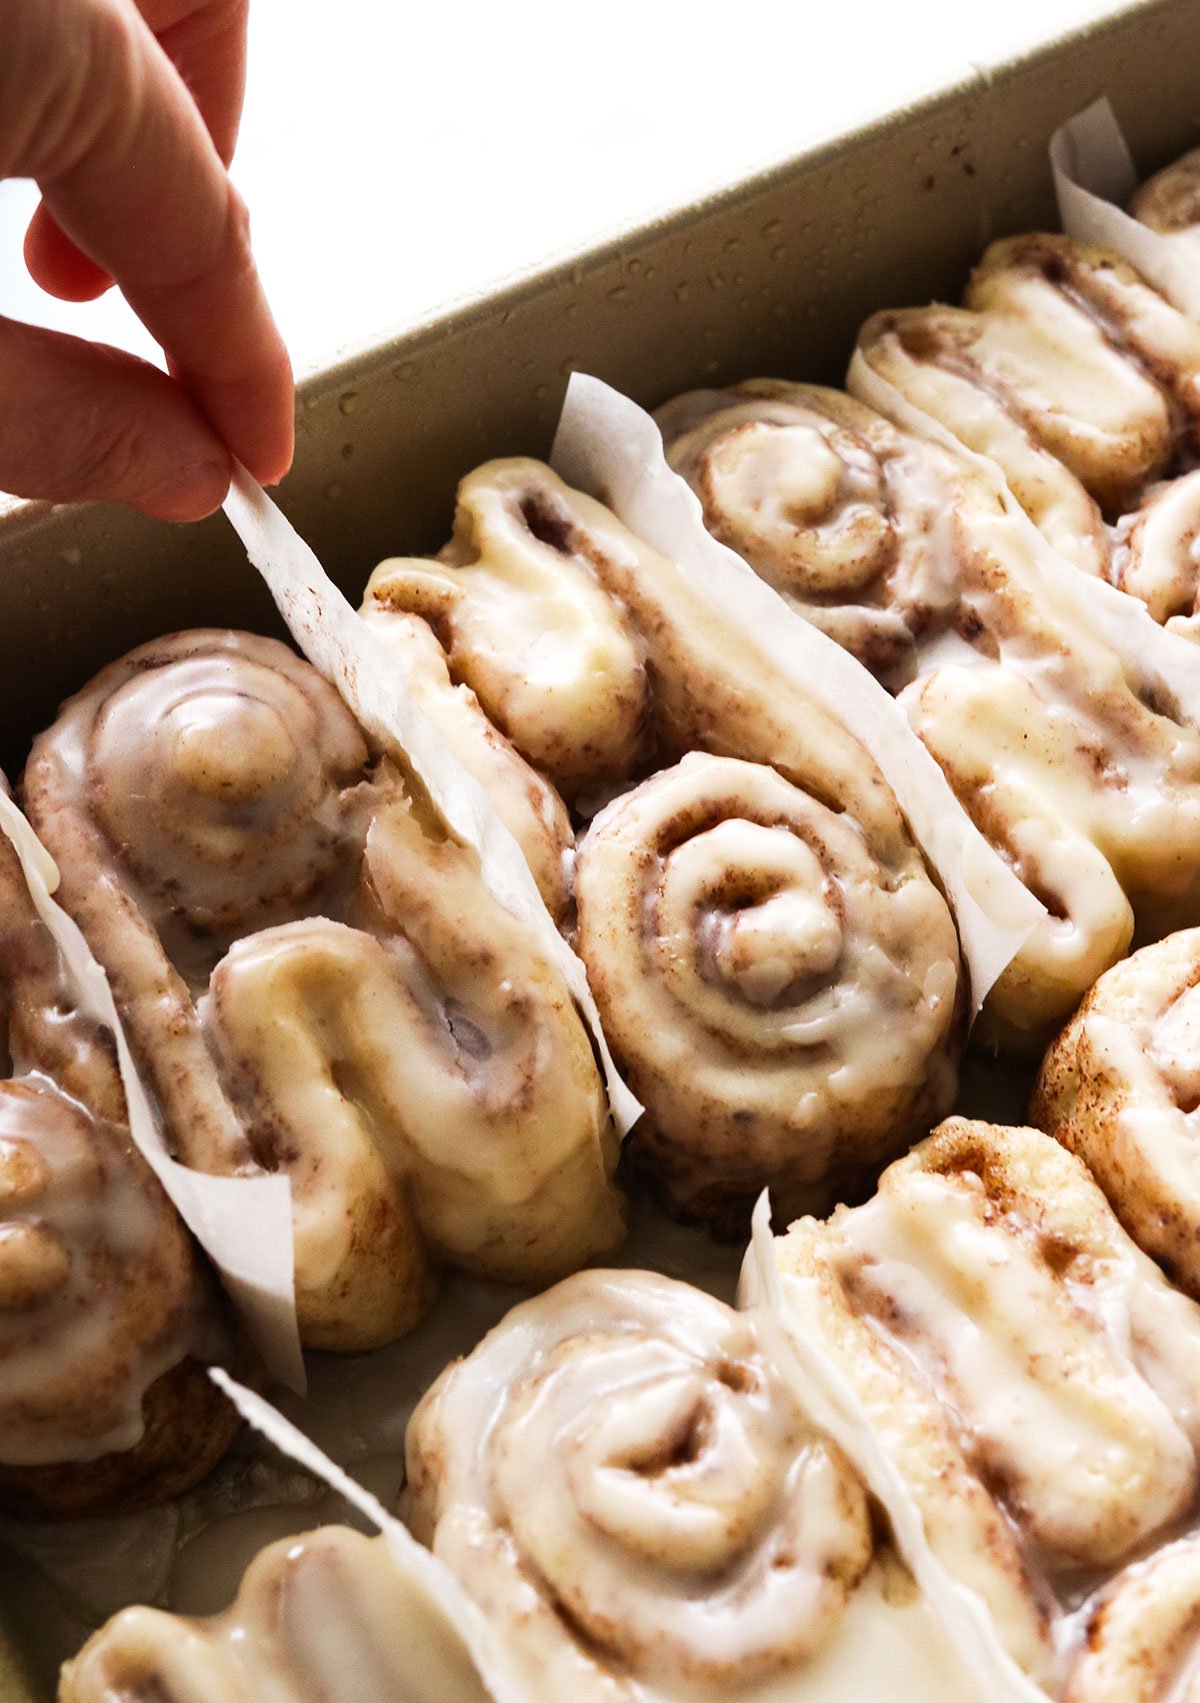
Serve cinnamon rolls warm for the best experience. Leftovers can be stored in an airtight container in the fridge for up to 5 days.
Looking for more fun morning breakfast ideas? Try Bunny Pancakes, Easter Deviled Eggs (that look like chicks!), or Spinach Pancakes.
Bunny Cinnamon Rolls
Bunny Cinnamon Rolls are perfect for a Spring brunch! You can use any cinnamon roll dough you love to create these fun bunny shapes, but the recipe below is the best gluten-free version ever.
Servings:
Ingredients
Cinnamon Sugar Filling
- 2 tablespoons melted butter
- ½ cup brown sugar
- 2 ½ teaspoons ground cinnamon
Frosting
- 2 tablespoons melted butter
- 1 ½ cups powdered sugar
- 1 teaspoon vanilla extract
- 2 tablespoons water
Instructions
-
To prepare the dough, combine the warm water, yeast, and sugar in a medium bowl and set it aside. A foam should develop on top in about 5 minutes, letting you know the yeast is good. (If foam doesn’t develop, try again with a different yeast packet.)
-
In a large bowl, combine the flour, sugar, baking powder, and salt. Whisk well to combine.
-
In a separate bowl, add ¾ cup warm water to the 3 tablespoons of psyllium husk. Stir well; it should quickly form a gel. Pour the gel into the bowl of flour, along with the melted butter and egg. Stir well, until no clumps of flour remain.
-
Place the bowl of dough in a warm place to rise for 1 hour. After that, transfer the dough to the center of a long piece of parchment paper on your counter. Use a floured rolling pin to roll the dough into a large rectangle, about 14 to 16 inches wide. The dough should be about ¼-inch thick or less.
-
Brush the dough with melted butter and sprinkle the sugar and cinnamon evenly over the top. Use a pizza cutter to slice the dough into inch-wide strips. You should get roughly 14 strips. Starting at one end of each strip, start rolling it up until you have a spiral roll. Repeat with the remaining dough.
-
To make the bunny shape, gently un-roll one of your rolls to the halfway point. Use the strip of dough you just unrolled to form two ears and leave the end of the strip near the unrolled portion. This should create a bunny-head look!
-
Repeat with the remaining rolls, then arrange them in a greased 9-by-13-inch pan alternating when the ears or head is touching the edge of the pan. Place a strip of parchment paper between each roll, to make these easy to release later. Let the dough rise again for 45 minutes, and preheat the oven to 350ºF about 20 minutes before they are done rising.
-
When the timer goes off, let these bunny cinnamon rolls bake at 350ºF for 25 minutes. While they are baking, mix the frosting ingredients in a small bowl.
-
Gluten-free rolls don’t brown the same way gluten flour does, so the rolls won’t look golden brown, but they should feel dry to the touch and spread to fill the pan. Spread the frosting over each roll while they are warm, then use your fingers to remove the parchment strip between each bunny roll. Serve warm for the best flavor and texture. Leftovers can be stored in an airtight container in the fridge for up to 5 days.
Notes
Note: You can use ANY cinnamon roll recipe you like to make these bunny shapes; even a can of dough from the store! I’m just sharing my favorite gluten-free option because it’s the most difficult to get right. (I tried a lot of bad ones before landing on this one; the psyllium husk is what creates the perfect texture.)
Sweetener Note: If you prefer to use natural sweeteners, coconut sugar can be used in the batter and filling. You can even blend it to create powdered sugar! For a frosting made without powdered sugar, try cashew icing.
Nutrition
Calories: 311kcal, Carbohydrates: 52g, Protein: 4g, Fat: 11g, Saturated Fat: 6g, Polyunsaturated Fat: 1g, Monounsaturated Fat: 3g, Trans Fat: 0.4g, Cholesterol: 39mg, Sodium: 211mg, Potassium: 79mg, Fiber: 5g, Sugar: 29g, Vitamin A: 323IU, Vitamin C: 0.01mg, Calcium: 67mg, Iron: 1mg
If you try this bunny cinnamon roll recipe, please leave a comment and star rating below letting me know how you like them.


